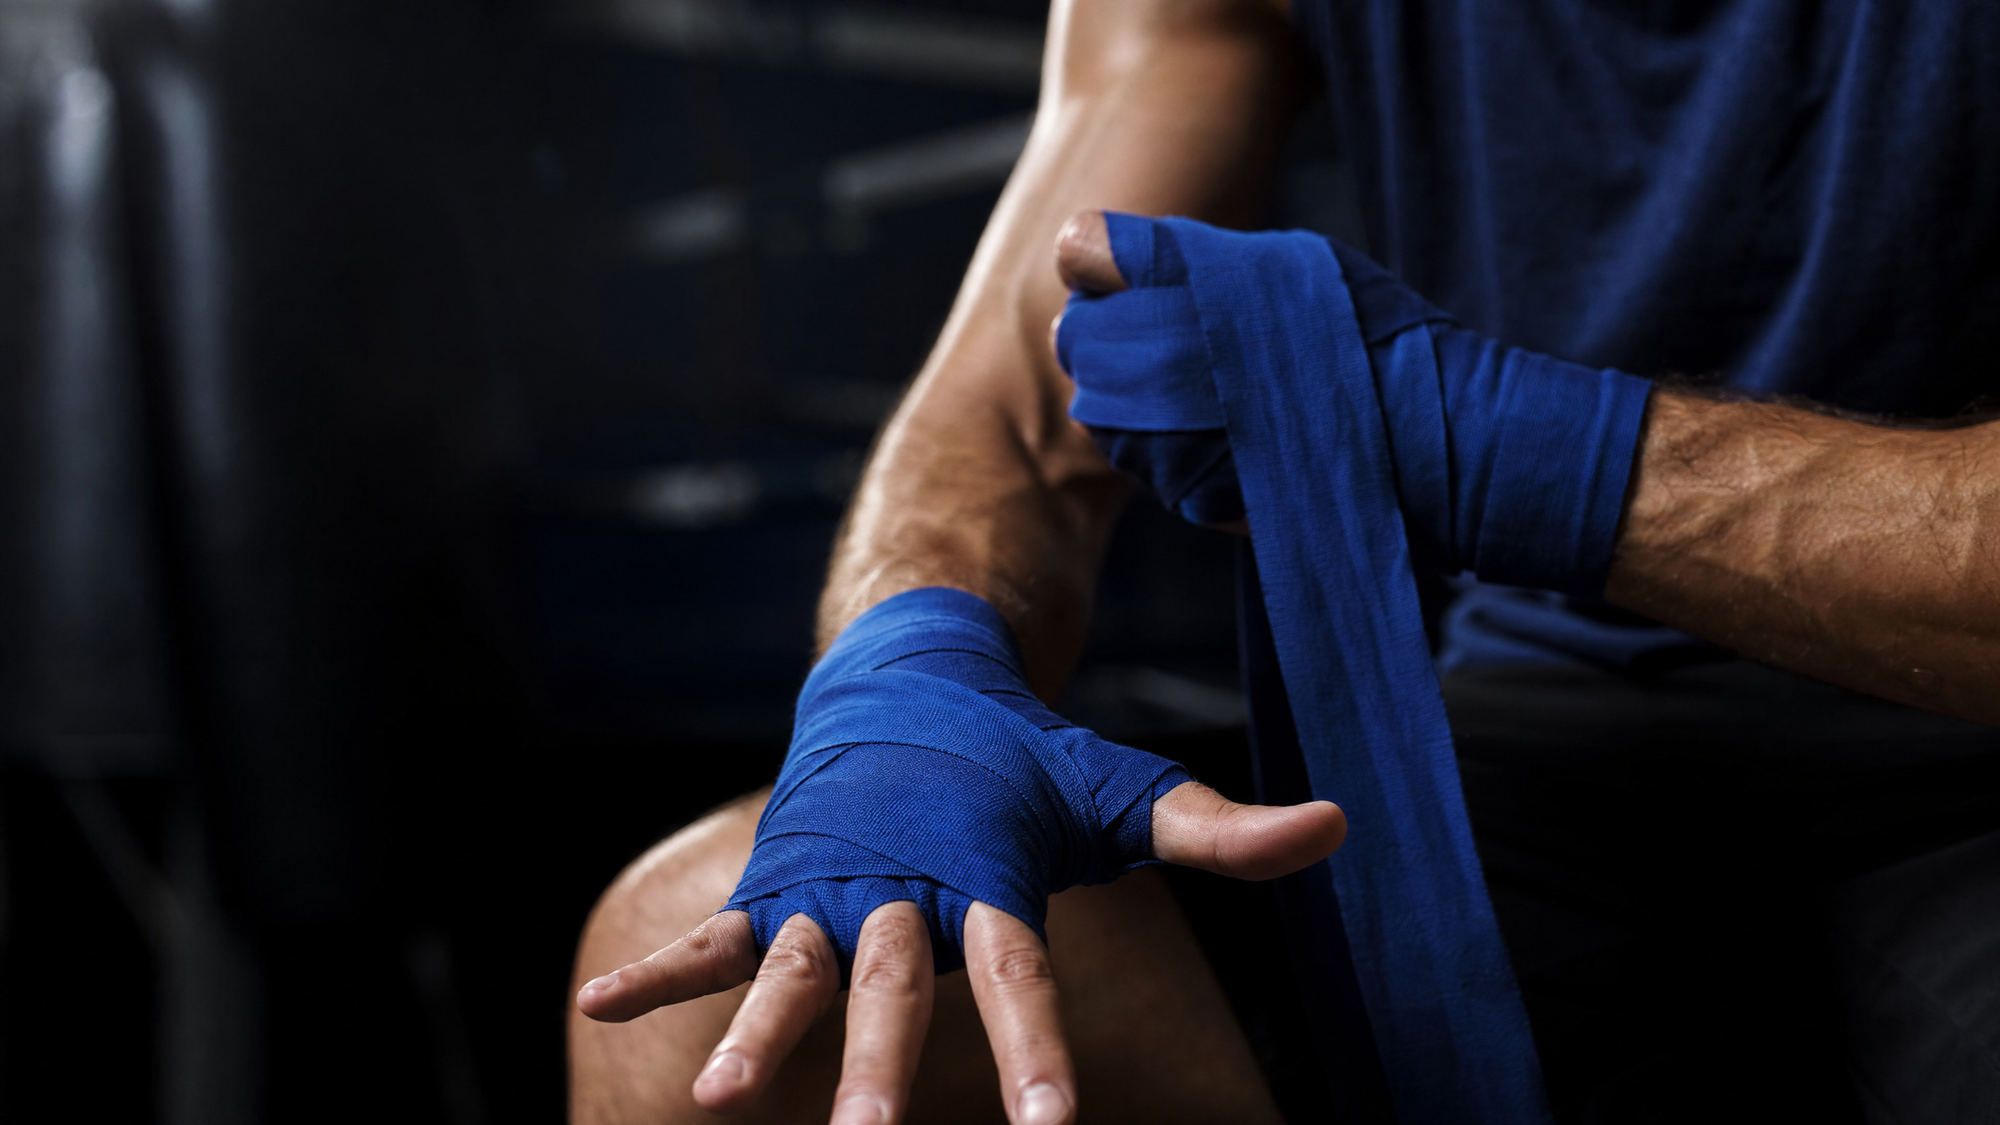
Learning how to wrap hands boxing is one of the first skills you need to develop. It supports your hand and wrist inside the glove and adds a layer over your knuckles when you throw punches.
Get this wrong and you risk injury. Get it right and the wrap feels snug and supportive without restricting your fist.
Quick Answer: To wrap your hands for boxing, loop the thumb loop, wrap the wrist 3 times, wrap the knuckles 3 times, wrap between each finger, cover the knuckles again, then secure at the wrist. 4.5m is a useful starting point for many adults; smaller hands may suit 3m. Check the finished wrap inside your glove. The entire process takes under 3 minutes once practised.
Why Hand Wraps Matter
Your hands take repeated impact when you punch. Wraps add support inside the glove, but good technique and a comfortable fit still matter. They cannot guarantee that you will avoid a fracture.
Hand wraps serve three functions:
- Wrist stabilisation. They add support around the wrist without needing to immobilise it.
- Knuckle compression. Layers over the knuckles add padding, with finger passes helping to keep those layers in place.
- Padding support. They fill the space inside your glove, ensuring the glove's built-in padding sits correctly over your knuckles.
Wrapping your hands is not optional. It is a structural necessity every time you hit pads, bags, or spar.
Choosing the Right Hand Wraps
Not all wraps perform the same job. The material, length, and construction all affect how well they protect your hands.
Wrap Length
Shorter wraps suit smaller hands. Longer wraps give more coverage and allow extra layers over the knuckles.
Material Type
Cotton wraps offer a firm, non-stretch hold. They stay exactly where you put them. Elastic (Mexican-style) wraps conform to the hand's shape and provide a snug fit. They are more forgiving for beginners learning to wrap.
| Feature | 3m Cotton Wraps | 4.5m Cotton Wraps | 4.5m Elastic (Mexican) Wraps |
|---|---|---|---|
| Length | 3 metres | 4.5 metres | 4.5 metres |
| Stretch | None | None | Moderate stretch |
| Knuckle layers | 2-3 passes | 4-5 passes | 3-4 passes (stretch adds compression) |
| Wrist support | Moderate | High | High |
| Suitable for | Light bag work, smaller hands | Full sessions, sparring | All-round training, beginners |
| Drying time | Fast | Moderate | Moderate |
| Durability | High | High | Moderate (elastic degrades over time) |
| Price range | £4-8 | £6-12 | £7-14 |
Not sure which wrap to choose? Read our guide to the best boxing hand wraps to compare the top options available in the UK.
Compare the length, fastening and material on the product page before choosing. Options include STING Elasticised Hand Wraps, ADIDAS Hand Wraps and BOXRAW Handwraps.
Browse the full range of boxing hand wraps to find the right type for your training.
Step-by-Step: How to Wrap Your Hands for Boxing
This method is the standard cross-wrap technique used in most boxing gyms. It provides full coverage of the wrist, knuckles, and fingers.
You will need one 4.5m hand wrap. Unroll it fully before starting.
Step 1: Secure the Thumb Loop
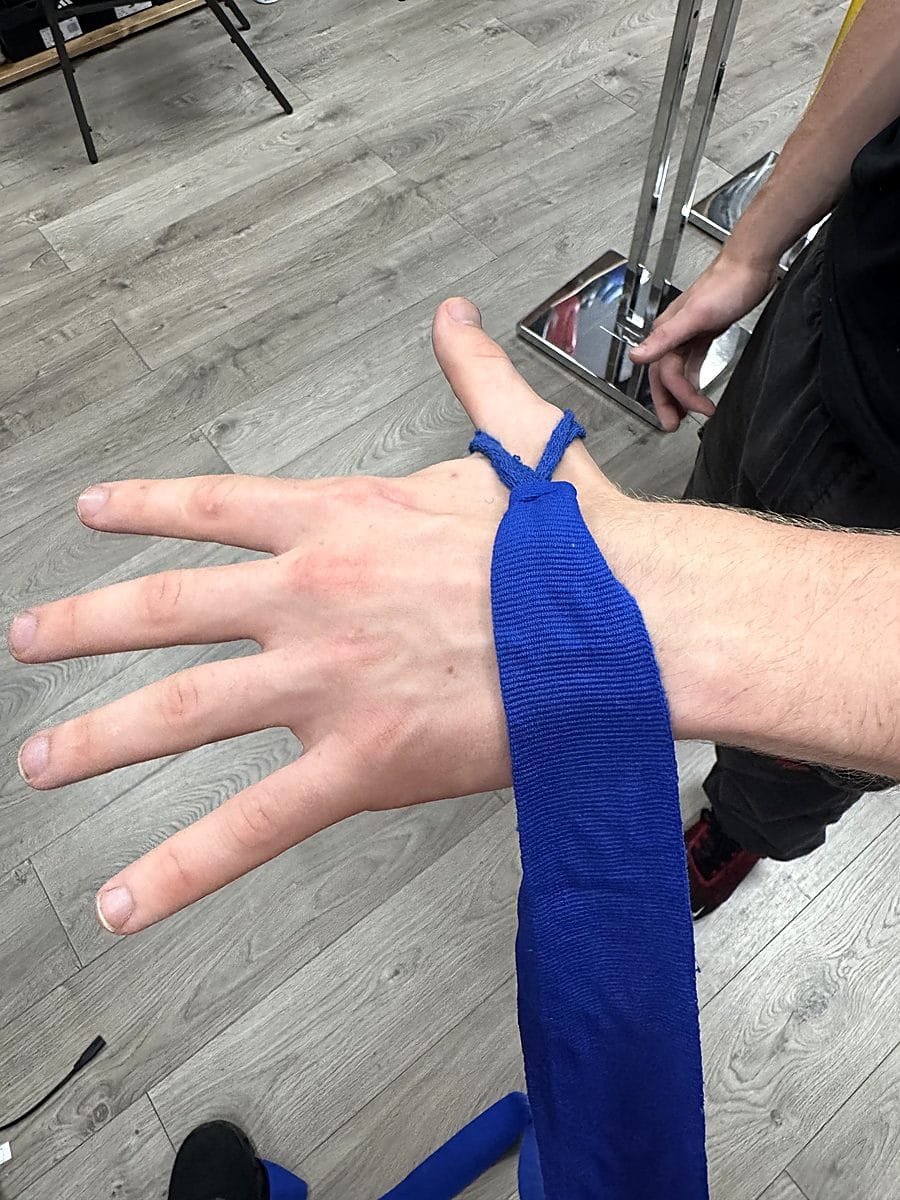
Place the thumb loop over your thumb. The wrap should run across the back of your hand. Make sure the velcro closure end is the last part you use. Keep your fingers spread throughout the wrapping process.
Step 2: Wrap the Wrist
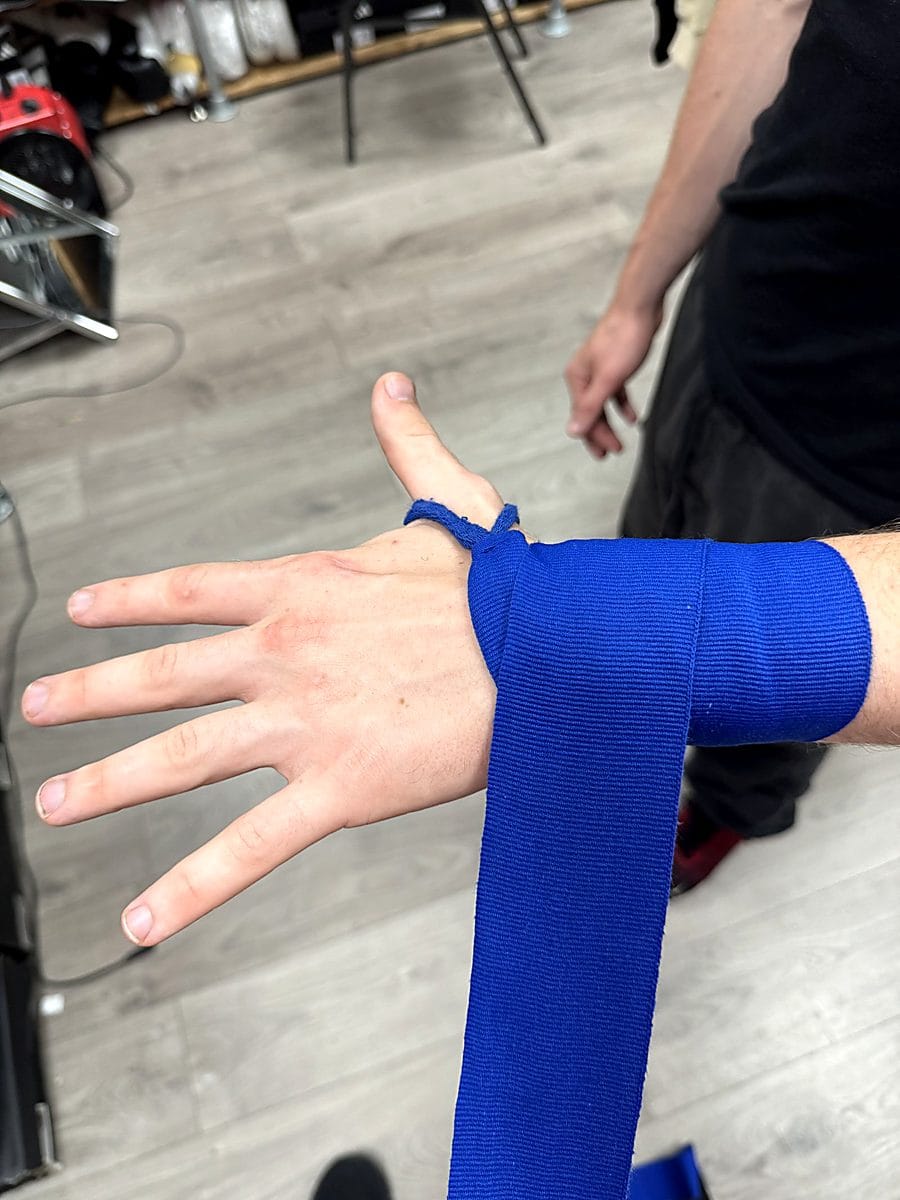
Bring the wrap around your wrist three times. Keep it flat with no bunching. Wrap firmly but not so tight that you cut off circulation. Your wrist should feel supported, not constricted.
The wrist wraps should sit just below the wrist bone. Keep the tension even and check that you can make a comfortable fist.
Step 3: Wrap the Knuckles
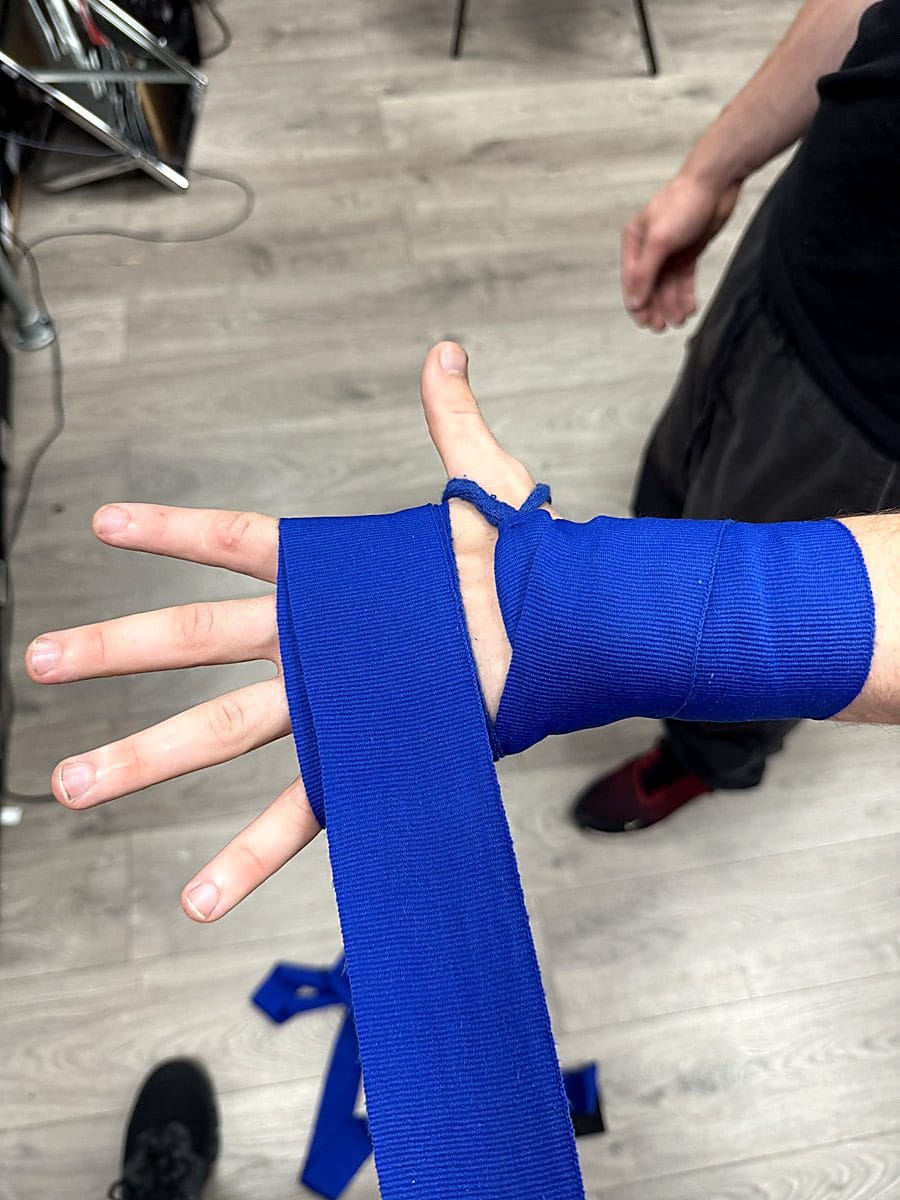
From the wrist, bring the wrap diagonally across the back of your hand to your knuckles. Wrap around the knuckles three times. Cover from the index finger knuckle to the little finger knuckle.
Keep your fingers spread while wrapping. This ensures the wrap is not too tight when you make a fist.
Step 4: Wrap Between the Fingers
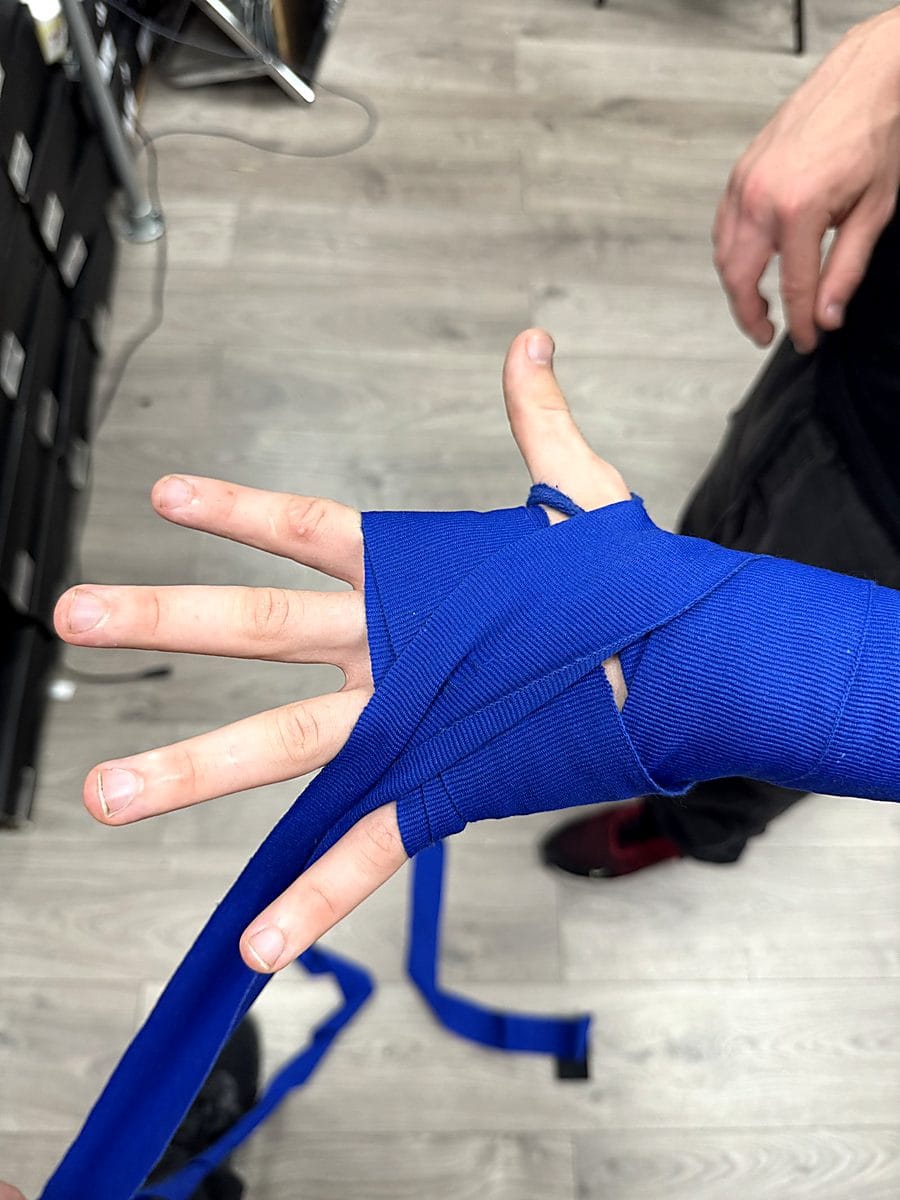
This step helps hold the knuckle layers in place so they do not bunch or slide inside the glove.
From the knuckle wrap, bring the material between your little finger and ring finger. Go from the palm side, up between the fingers, across the back of the hand, and back to the wrist.
Repeat between the ring finger and middle finger. Then between the middle finger and index finger.
Each pass should return to the wrist before going between the next pair of fingers. This creates an X-pattern across the back of your hand.
Step 5: Secure the Thumb
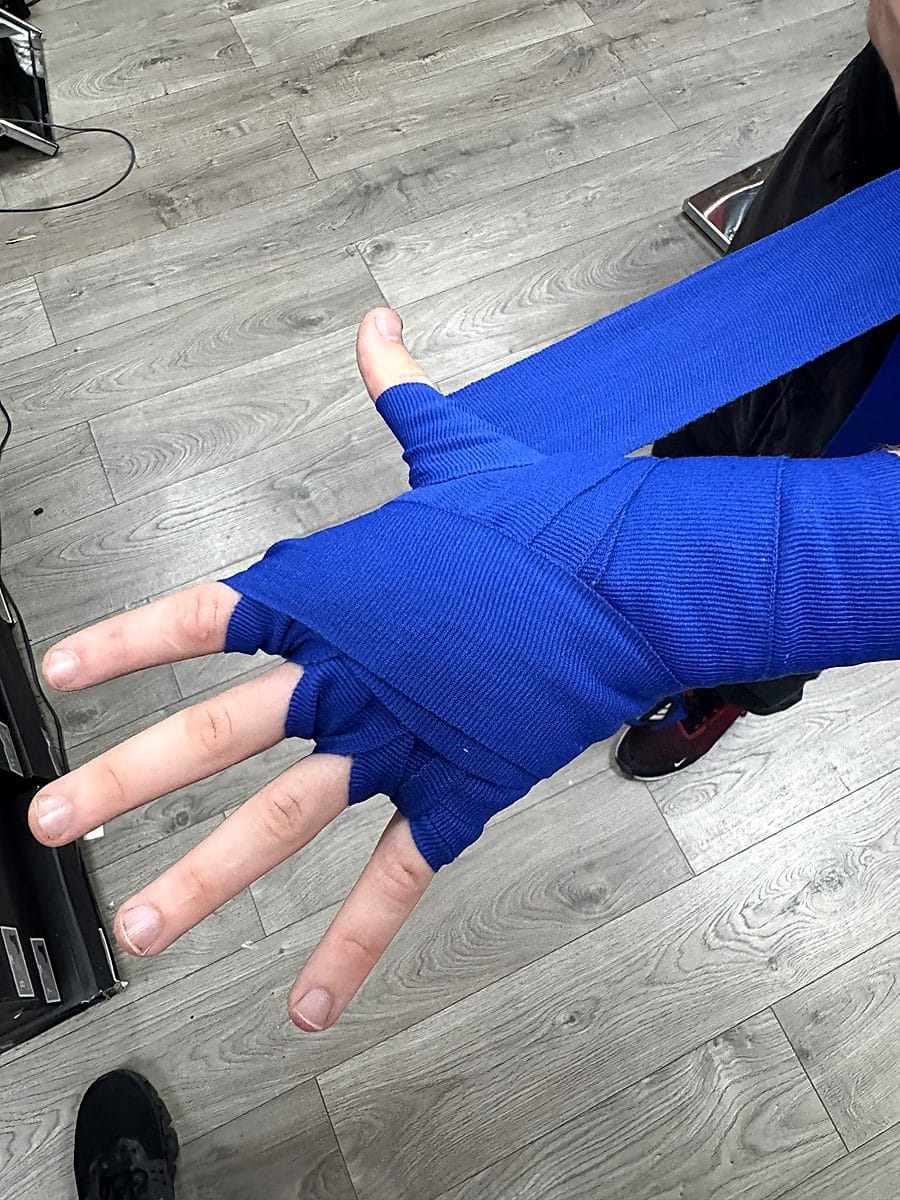
Wrap once around the thumb at its base. Then bring the wrap across the palm and back to the wrist. This anchors the thumb without restricting its movement.
Step 6: Cover the Knuckles Again
You should have remaining wrap material. Use it to wrap across the knuckles two or three more times. This adds padding directly over the impact area.
Step 7: Finish at the Wrist
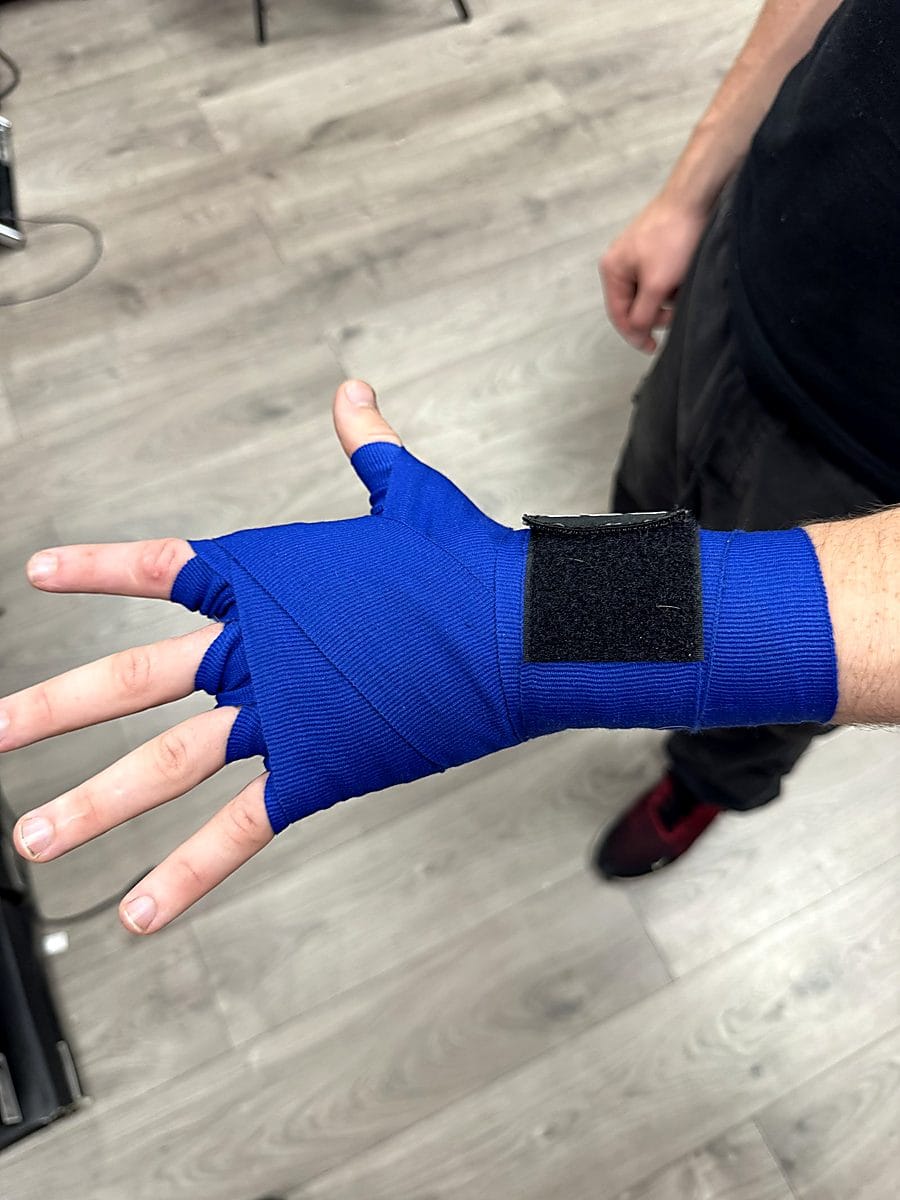
Bring any remaining wrap back to the wrist. Wrap until the material runs out. Secure with the velcro tab.
Step 8: Check Your Work
Make a fist. The wrap should feel snug and supportive. Your fingers should close fully without restriction. Open your hand flat. You should not feel pinching or excessive tightness.
If your fingertips tingle or go white, the wrap is too tight. Remove it and start again with less tension.
Common Wrapping Mistakes
These errors reduce protection or cause discomfort:
Wrapping too tight. This restricts blood flow. Your hands will fatigue faster and you risk nerve compression. The wrap should compress, not constrict.
Skipping the finger wraps. The finger passes help keep your knuckle padding in position. If your method or wrap length leaves it shifting, have your coach check the wrap.
Bunching the material. Folds create pressure points inside the glove. Keep the wrap flat at every stage.
Wrapping over bent fingers. Always keep fingers spread during wrapping. Wrapping over a closed fist makes the wrap too tight when you open your hand.
Using worn-out wraps. Elastic wraps lose their stretch over time. Cotton wraps fray and thin out. Replace wraps when they no longer hold their shape. A fresh pair of quality hand wraps costs less than a trip to the fracture clinic.
Wrapping with a damp wrap. Wet wraps stretch unpredictably and harbour bacteria. Always use dry wraps. Own at least two pairs so you can rotate.
Wrap Maintenance and Hygiene
Hand wraps absorb sweat. Without washing, they become a breeding ground for bacteria and fungi. This leads to skin infections and unpleasant odours.
Wash your wraps after every session. Follow the care label for temperature and washing method. If machine washing is permitted, use a mesh laundry bag to prevent tangling. Air dry rather than tumble dry, as heat degrades elastic fibres.
Roll your wraps after drying. Start from the velcro end and roll towards the thumb loop. This means the thumb loop is on the outside, ready to use next time.
Empire wraps and Sting wraps should be cleaned according to the care label on your specific pair.
When to Use Quick Wraps vs Traditional Wraps
Quick wraps (also called inner gloves) are padded slip-on gloves with a wrist strap. They save time. They do not provide the same level of structural support as a full hand wrap.
Use quick wraps for:
- Light cardio boxing classes
- Situations where time is limited
Use traditional wraps for:
- Pad work with a coach
- Heavy bag sessions
- Sparring (always)
- Any session lasting more than 20 minutes
Traditional wraps allow you to customise tension and coverage. Quick wraps offer a fixed level of support. For serious training, traditional boxing wraps from established brands remain the standard.
Wrapping for Different Hand Sizes
Hand size affects which wrap length you need. Smaller hands may get enough coverage from 3m wraps. Larger hands often need 4.5m to complete the same steps without running short.
If you have particularly large hands, some manufacturers produce 5m wraps. Check the stated length of the model you are buying.
If you find yourself with excess material after completing all steps, add extra passes over the knuckles. Check that the extra padding still leaves room to close your fist comfortably inside the glove. Never leave excess material bunched at the wrist, as this creates instability.
Wrapping for Specific Injuries
If you have a pre-existing hand or wrist injury, get advice on returning to punching before changing your wrapping technique.
Wrist injuries: Extra wrist passes are not a substitute for assessment or rehabilitation.
Knuckle injuries: Do not use extra padding to train through pain.
Thumb injuries: A tighter thumb loop is not clearance to resume contact work.
Consult a sports physiotherapist for persistent hand pain. Stop activities that make the pain worse; wrapping technique cannot clear you to train through an injury.
Which Wrap is Right for You?
| Your Situation | Best Choice | Why |
|---|---|---|
| Complete beginner, first sessions | 4.5m elastic (Mexican-style) | Forgiving of imperfect technique, conforms to hand shape |
| Regular bag and pad work | 4.5m cotton | Firm hold, durable, washes well |
| Sparring sessions | 4.5m cotton or elastic | Full coverage essential, never skip wraps before sparring |
| Small hands or youth training | 3m cotton | Adequate coverage without excess material |
| Large hands or wide knuckles | 4.5m elastic, or a verified longer option | Extra length ensures full knuckle coverage |
| Quick cardio class | Quick wraps (inner gloves) | Speed of use, adequate for light sessions only |
| Pre-existing wrist injury | Individual assessment before contact training | Choose the wrapping method once your return to punching has been agreed |
Frequently Asked Questions
How long should hand wraps be for boxing?
For most adults, 4.5m (180 inch) wraps provide full coverage of the wrist, knuckles, and fingers with enough material for adequate padding layers. Smaller hands or youth fighters can use 3m (120 inch) wraps. Choose enough material for your method without making the glove too tight.Can you box without hand wraps?
Use wraps for bag work, pads and sparring. They add support around the hand and wrist and help you get a secure fit inside the glove, but they do not guarantee protection from injury.How tight should hand wraps be?
Snug enough to feel supportive when you make a fist. Loose enough that your fingers do not tingle or change colour. You should be able to spread your fingers slightly and close them into a full fist without restriction. If you feel numbness, rewrap with less tension.How often should you replace hand wraps?
Replace cotton wraps when they fray, thin out, or no longer hold shape. Replace elastic wraps when the stretch becomes inconsistent or the material stays permanently elongated. How quickly they wear depends on use and care. Velcro that no longer grips is another sign it is time for new wraps.What is the difference between Mexican-style and traditional hand wraps?
Mexican-style wraps contain elastic fibres that allow them to stretch and conform to the hand. They provide a close, even fit and are forgiving of imperfect technique. Traditional cotton wraps have no stretch. They hold their position firmly and offer rigid support. Both protect effectively when applied correctly. Many fighters prefer Mexican-style for training and cotton for competition.Where to Go Next
- Shop All Boxing Hand Wraps – browse the full range of cotton and elastic wraps
- Best Boxing Hand Wraps – our guide to the top wraps available in the UK
- Best Boxing Gloves – choosing the right gloves to go with your wraps
- Sting Boxing Equipment – quality wraps at competitive prices